

Paddleboarding is a fun activity, but paddle boards don’t come cheap, do they? If this is your pain-point, no worries! We’ve got you covered.
You can consider a DIY paddleboard. All you need to do is follow our step-by-step instruction, and you will be good to go. The good news is that you should be able to create a paddleboard for yourself at the end of this article. Let’s walk on water!
Making a Paddle Board: Step-by-Step Guide
Step 1: Gather All the Things You’ll Need
- Quarter-inch plywood
- One piece of polystyrene foam if you don’t prefer plywood
- Fiberglass resin
- Acrylic gum
- Something to spread the adhesive
- Something to shape the wood like a rasp or orbital sander
- Weights that you can place over the ply till the adhesive dries
Step 2: Make a Layout
This involves making a template for the paddleboard. If you need specifics on sizing, there are various plans on the internet to use as a reference. Take note that paddleboards are a little bit wider than surfs, which are 25-26 inches wide. They are just as long.
You can take your length specifics from conventional surfs at around 10-12 ft. The tip of the paddle should not be pointy but rounded. Use an old paddle as a template, carefully trace one of the sides on the paper, and then flip it over to ensure the shape is symmetrical.
Step 3: Glue the Sheets Together
Glue several sheets of foam that you have chosen, for more stability and strength, you can add wooden dowels in the midsection. Spread the glue evenly using a plastic towel. Use the set weight to pin everything together and wait until it air dries completely.
Step 4: Create the shape
Use the templates you have made to cut the shape into the foam layers that you put together. Be careful at this stage, and do not rush.
Step 5: Cut Out the Foam
When the foam you have to use is in excess, cut it out with a shape tool. You can start with a rough cut. Then begin to cut near the template line; this time, you will need to use a smaller tool to get something more refined. You want to make an upward curve on the board for buoyancy; this step can be tricky; we recommend you do it with caution. Once the excessive foam is carved out, and the mold is symmetrical, proceed with an orbital sander and make sure the curve is sharp. This is a bit difficult, but the right shape will permit the board to float properly.
Step 6: Hone Your Board
Check the board out and make sure that it is what you want. Since it is a DIY, it can be personalized, and you do not want to miss the fun; go wild with your design. Buoyancy is one of the major features here and cannot be overlooked.
Step 7: Attach the Fiberglass Cloth
If you are using fiberglass, this involves covering the board with fiberglass cloth and coating it with epoxy resin. This should be done within minutes because resins get set easily. If you want to add color, when ordering the resins, pick your preferred color. Two layers should be enough. Sand off any bumps and lumps and add some fiberglass to any of the board’s weak parts, especially the nose and tail.
Step 8: Add Handles, Fins, Feet Grips & More
Adding the handles, fins, and the feet grips will add a bit of functionality to the board, and this will, in turn, make paddling easier. You can also customize the board with any waterproof material; once you’re done, take the board out and give it a try.
Step 9: Laminate the Deck & Board
Laminating is just like tailoring, set the glass on the board, and cut it, so it hangs over at about three inches and then wraps around to the underside till it tightly fits. Darting is required to accommodate the curves. Laminate the base of the board first, use masking tape to prevent splashes. When laminating the deck, cut a layer of fiberglass that fits, and then a second layer, which will go on top of the first overlapping by 3 inches.
Use your hands to smoothen them, from the center to the end, and then from the top to the middle to remove the wrinkles. Pour the adhesive over the two decked layers. Spread the adhesive with long strokes, and while doing this, listen to spot out a zinging sound, which means the adhesive has spread out properly.
When you are laminating the board, you are protecting the board. It can be hard to apply self-hardening resins. You can use polyurethane as an alternative—they go easier and can be sanded off after applying.
Using Plywood Vs. Fiberglass for a Paddle Board
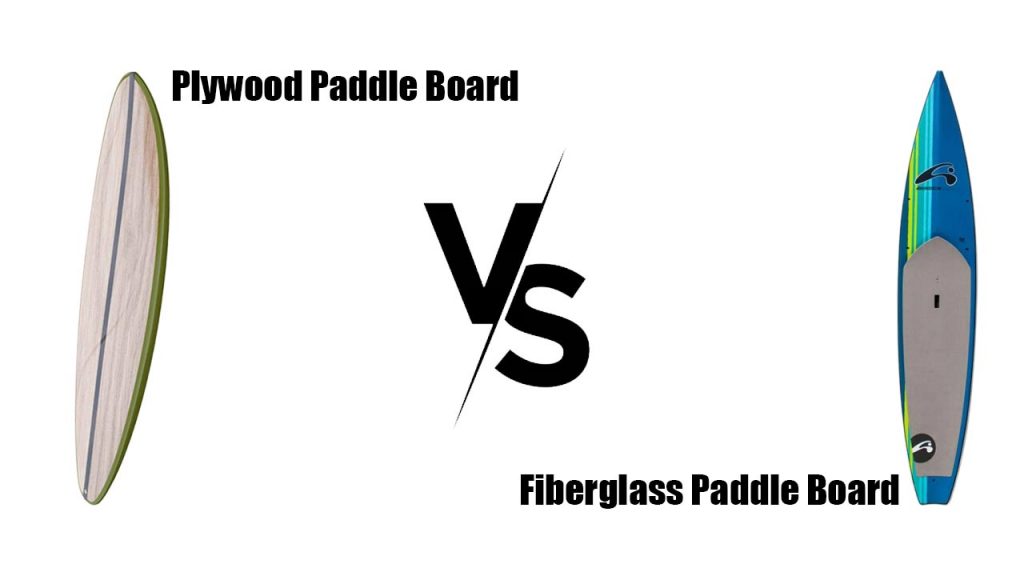
Plywood is good as a top surface, but it doesn’t look as good as the fiberglass does. If you want to use plywood, you need to apply a polyurethane layer to avoid water damage. This can also make the job a bit harder.
Using the fiberglass allows you to do various paint jobs on the board and since they don’t need any extra material, they are easier to work with
FAQ:
Q. How much does it cost to make a paddleboard?
Ans. Making paddleboards is quite cheaper than buying one, but it might be easier to take your money to a utility store. You can make the paddleboard in your garage at home or go DIY for yourself and the family.


Leave a Comment