
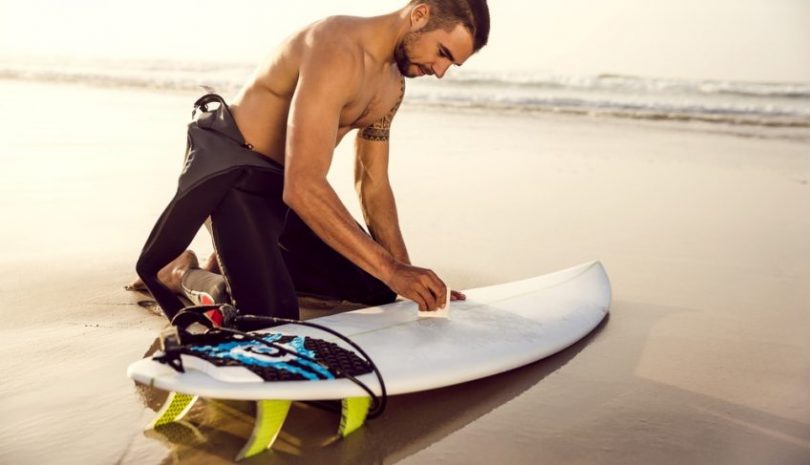
The first thing to note is that waxing a surfboard is easy. However, getting the job done correctly requires the right technique and specialized tools. This is the best place for you to harness the skill to get the job done perfectly.
How to Wax a Surfboard Correctly
1. Gather Your Essentials
The essentials include –
- a bar of base covering or a temperate water wax,
- a bar of appropriate wax for the top coating,
- a wax untangle-er or a plastic scrub,
- and a wax dissolver if you like.
2. Choose the Right Wax
Even you have the best surfboard in your collection, without applying the right wax you can’t expect a great result out of it. It is important to note that surfwaxes are not a very durable product. There are different variants for different purposes. Temperature is what determines the way you surfwax. That is, the location you intend to surf in determines the type of wax you have to buy.
In warm water, it is preferred to use hard wax, which has a high dissolving temperature. While, in colder temperature-well- you need the softer wax. If you dont use the preferred wax, surfing will be difficult, due to slipping and slidings that are likely to occur on the surf’s surface.
3. Clean the Surfboard
This might not be required when you are waxing a new surfboard. But, with older surfboards, you are going to have to clean first. Expose the board to the sun for a few minutes. Assuming you already have the wax comb in place, use the narrow side of the wax comb or plastic scrub, making long straight lines vertically across the board until all of the surfwax is removed. If there is not enough sun, to burn the wax out, use some liquid wax remover to displace the excess wax.
4. Apply the Base Coat
Before you think about doing this outside, be observant of the temperature. It is recommended to do this part of the job indoor. The thing is friction is created when you’re waxing, causing heat as a result that makes the wax smear when applied under direct sunlight.
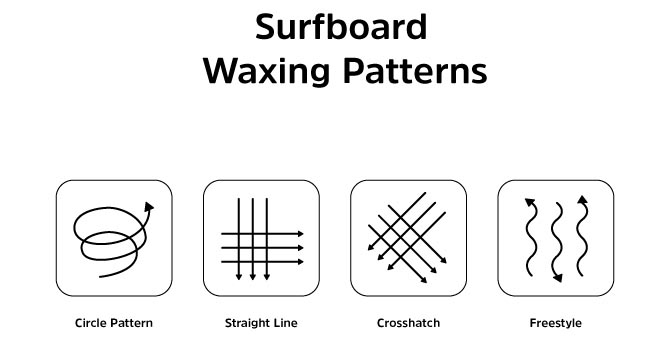
There are two significant ways to wax a surfboard –
a) Circle method
It can be more difficult to wax in the circle lar method. However, waxing in small circles can give a more consistent bump of a wax smear.
b) Criss-cross method
This can be time-saving, which is evident in why tour professionals use different boards yearly.
None of them is the wrong way; it falls to preference. So, place your surfboard on your laps and get the job done.
[amazon bestseller=”surfboard wax” items=”3″ grid=”3″]5. Apply Your Technique
a) Circle method
Grip your bar of wax, making sure that the thinner side touches the board. With light pressure, rub the wax in small circles, carefully moving through the board’s surface with each new circle. Do not forget that this is just the base coat; don’t put a layer that is too thick. Only a thin layer is recommended at this point.
Continue to apply the wax in circles on the board until the whole surface is covered—rail to rail on the parts where you will place your feet and where you intend to put your hands when you want to pup-up. For the longboards, it is recommended to wax the entire deck. For the shortboards, cover two feet in the middle, then the tail. Use the corner of the bar to direct you to get wax where it needs to go.
b) Criss-Cross method
Grab the bar of the wax to use the thinner side. With minimal pressure, draw long diagonal lines through the deck of the board, on the sides that you will be standing, and where your hands will be when you pop up. For the longboards, this implies that you will be making a diagonal line through the entire deck. For the shortboard, you cover about two feet in the middle of the board and then the tail when you are not using the traction pad.
As soon as the crosshatch is concluded, cover the squares with minimal circular motions. If there are pressure dings that are not getting filled, utilize the wax’s edge to apply it where it needs to go.
6. Apply a Top Coat
Without regard to the methods used in applying the base coat to the board, you have to apply the top coat of wax in small circles. We are going to be applying a topcoat to make little bumps. This method can be accomplished with minimal pressure and uniform waxing motion. This time, use a thicker layer of wax on the topcoat. As soon as the board is good and covered in wax, you’re good to go!
7. The Final Touch
This step is not for everyone. If the coat of wax is not brand new then give the surfboard a quick comb, which is to rough the surface to enable your grip.
Additional Tips for Perfect Waxing
Remember during surf sessions to comb your deck and add an extra layer of topcoat wax on the surfboard after every two months.
After every paddle out, you will want to get some fresh wax. During the first few surfs after a new coat, only apply a skinny coat to freshen up and ensure a good grip.
But once a decent layer has been built, use the wax comb to scrub crisscrosses on the board to expose fresh wax to enable grip.
If you are not with a comb, you can get knee-deep into the water and rub some sand on the wet board, to roughen the surface.
Conclusion
At this moment, your surfboard is usable, and you have no excuse not to go surfing. Stay safe and make sure to the social distance while surfing.


Leave a Comment